Friday, April 27, 2012

Pear, almond & semolina cake


Try this recipe over the weekend - I just made it up and I think it's worth sharing (I'm on to my second slice!). It's getting cold, so this is the perfect thing to make the house feel warm & cosy.


Pear, almond & semolina cake

200g butter
1 cup brown sugar
zest of 1 lemon
3 eggs
vanilla essence
250g almond meal
250g semolina
2 tsp baking powder
2 pears


Cream butter & sugar with lemon zest until creamy.
Add eggs one at a time, beating after each one.
Fold in essence, almond meal, semolina & baking powder.

Place mixture into a large-ish cake tin (lined with baking paper) & spread out evenly.

Quarter and core pears (don’t peel).
Slice each quarter into 4, lengthways.
Place the slices of pear, skin side up, into the dough, fairly close together so that you fit all or most of them in. Push them down a bit so they don’t pop up.

Sprinkle the pears with ground nutmeg, cardamom and allspice.

Bake at 170 for about an hour or until it’s done (careful not to let it dry out too much).
Let it sit in the tin for 5-10 min after you take it out of the oven, then transfer to a wire rack to cool. Serve with yoghurt or double cream.

Makes a crumbly, moist, rich buttery perfect Autumn cake!

Monday, March 5, 2012

A box of tomatoes


I am a total sucker for a bargain, and when I saw this box of sauce tomatoes at my local veggie growers for $5, even though I have no time to do anything with them, I couldn’t resist.
If they’d been $10 I would have passed them up – but $5? Too good!

So here’s what I’m going to do with them:

Wash the tomatoes & cut out any bad bits, then chop them up roughly and spread them out in a roasting dish or two.
Turn the oven onto about 200C.

Then spread any or all of the following over the top, depending on what you like:
- Oilve oil
- Balsamic vinegar
- Salt & pepper
- Herbs (dried or fresh or both)
            Eg: basil, thyme, rosemary, parsley, bay leaves
- Whole garlic cloves (you don't even have to peel them)
- An onion or two (brown or red), roughly chopped
- Lemon zest
- Dried or fresh chilli (just a little bit!)

Give it a quick toss in the tray, then pop them in the oven for about 1 1/2 hours, or until it’s smelling DIVINE and the garlic is soft. You can turn them during cooking if you want to, but don't worry about a small amount of browning around the edges as it adds flavour.

The thing that usually puts me off doing anything with bulk lots of fruit these days is the end bit – the bottling. I’ve done heaps of it and I can’t be bothered any more.
Soooo…
I’m going to put the resulting ‘sauce’ into freezer bags (I’ll use my vacuum sealer, but any clean plastic bag is fine, zip-lock bags are good) once it’s cooled down.
I always freeze this sort of thing as flat as possible (see the picture) so that it doesn’t take long to defrost when you want it later on. Don’t forget to name and date the bag – saves the guess work 6 months down the track.

This tomato base can now be used for all sorts of things.
-       Simply reheat and serve with fresh pasta
-        Use in place of crushed or tinned tomatoes for bolognase, chilli con carne,, minestrone, etc…
-        Reduce the liquid by cooking it down in a large frying pan to make pizza sauce
-        Add to more sautéed onions & garlic, some red lentils and even some roasted capsicum or other veggies, pour over stock or water, cook until the legumes are soft then puree to make a delicious soup. Top with coriander and feta to serve.
-        Use as layers in a lasagna (esp. veggie lasagna – yum!)
-        Place some good quality sausages (or veggie alternative, like whole baby zucchini or tofu) in a roasting dish, ½ cover with the roasted tomatoes & bake until sausages are well cooked
Too easy!

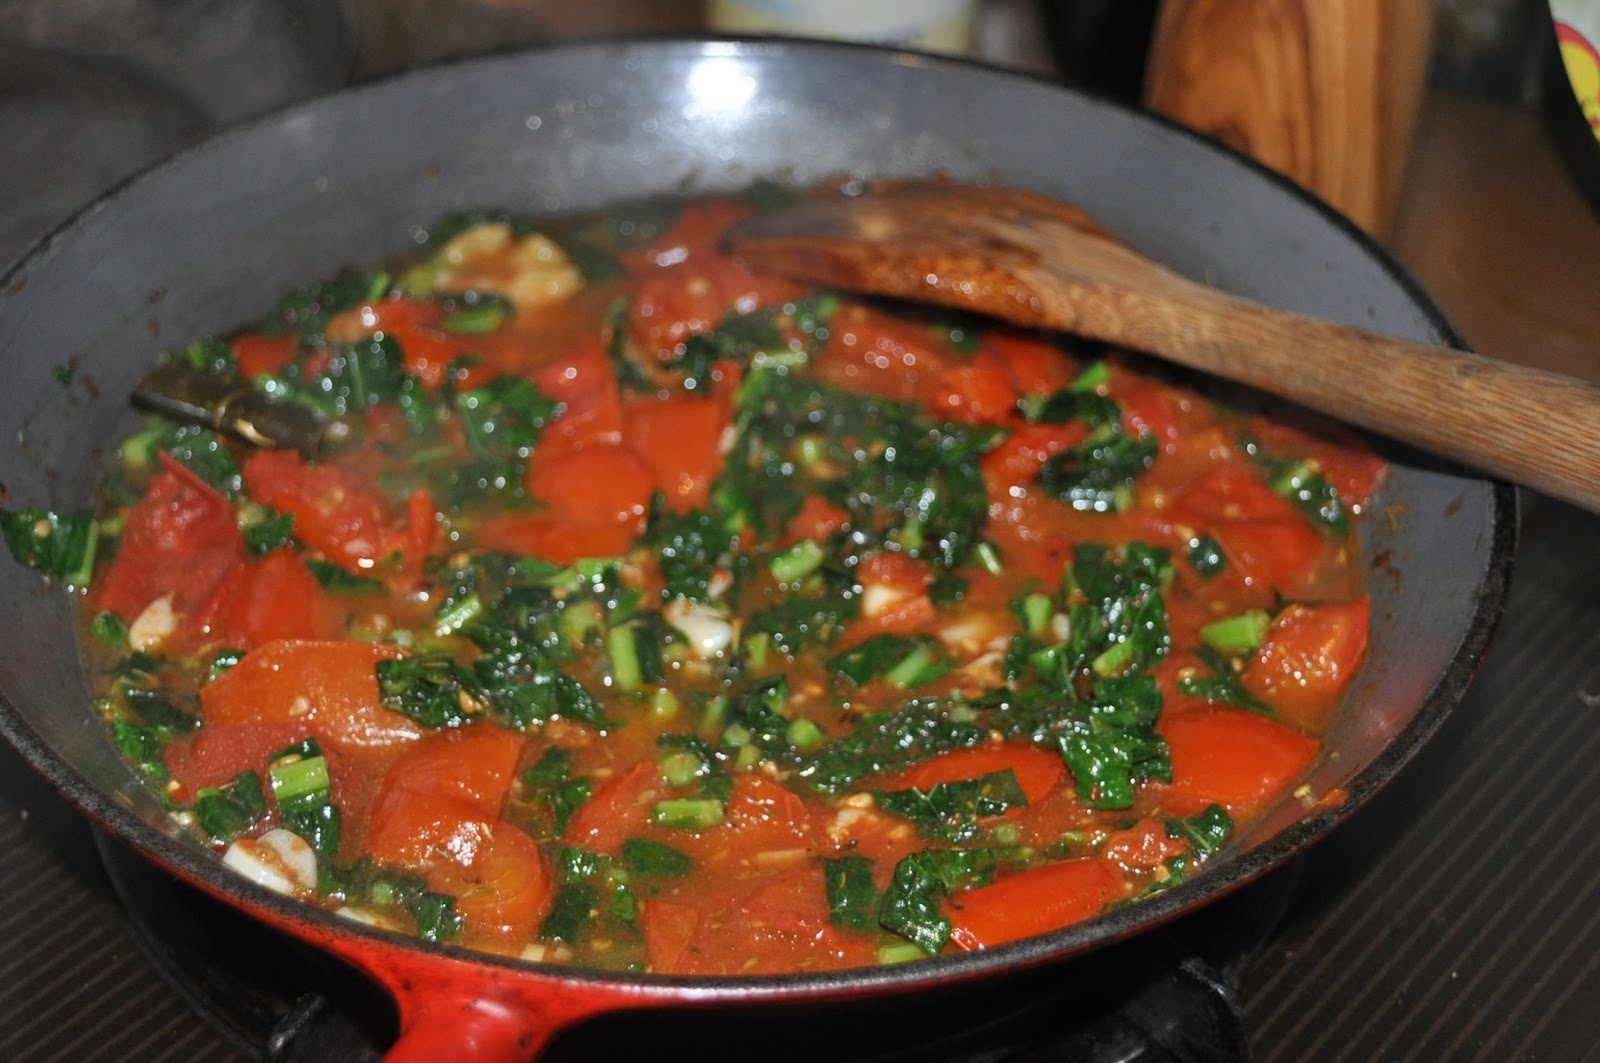
Oh yes - if you were wondering what the green stuff is in the top photo - it's kale. I use it for green smoothies in the morning but I also love eating it with pasta, so I fried some up with a bit more garlic, chilli and olive oil, then added some of the roasted tomatoes for my pasta sauce this evening. Add to that a bit of chilli pecorino & you're in business!

Monday, February 13, 2012

No more meals.... for now.

Ginny’s Kitchen is no longer producing meals – but that doesn’t necessarily spell THE END for the GK business.
The other day I scrubbed the words "Ginny’s Kitchen – Food on the Fly” off my sign on the fence. I could have just taken the whole thing down but I love the heart logo that my friend Kate designed, and I wanted to leave it up there.
We live on a busy corner, and I like the fact that visitors and locals drive past every day, seeing a symbol of love standing out there for no particular reason. Some people might know it went with my kitchen, but most will have no idea what it means, and so I hope that it just makes them feel a little bit warmer on the inside, remembering love, especially in a beautiful place like Red Hill.

Underneath the sign, we’ve actually got a new sign, advertising local avocados. Maybe people will think that’s what the heart is about? We’ve struck a great deal with the avocado grower where we get a regular supply of his produce in exchange for displaying his sign, so I don’t mind him taking advantage of the love heart at all!

So what’s going to happen to Ginny’s Kitchen?

After all the hard work of last year – hours spent developing labels and recipes and “the brand” I don’t intend to leave it all behind, but I had to make a choice between regular employment (I’m a public servant in my other life) and lots of cooking, and for now the regular employment has won out.

I got to a point where I needed to be able to grow the business in order to make it worth while, but I didn’t have enough time to do that (as well as cook, work, run a family and have some time to myself!), and towards the end of the year I began to feel like I wasn’t doing anything well.

It is a little frustrating, as there are plenty of opportunities to grow the meals business in all sorts of directions, but now that I’ve stopped doing it, I actually feel kind of relieved. The blurred lines between home and work didn’t suit me. I need to find another way to be creative and lucrative – outside of my precious family life.

Food is my creative outlet. It’s appealing to me because it has a tangible product at the end of your hard work, and it’s usually something that others appreciate. I enjoyed having a wider audience to share my love of cooking with, but once it became hard work, I stopped enjoying it as much. And since I’ve stopped cooking for the business, I’ve been taking enormous pleasure in tending my veggie garden, cooking simple salads and BBQs, and playing with my kids

Eating well is a life-long passion and pursuit, which I hope I can continue to share with others in as many ways as possible. In my other work I still get to do this through Community Kitchens (communitykitchens.org.au). I also want to get better a sharing thoughts and recipes on this blog. I can cook for my friends and family and then I will just have to wait and see what the future has in store…

Anyone got a good recipe for avocados (other than guacamole!)?

Sunday, April 3, 2011

I found my butcher

In my efforts to source locally grown produce for the take home meals I'm about to launch, I followed a lead from a friend who had told me about her cattle producing neighbours Tim and Ben (father and son).
I knew they had an outlet in Mornington on Wilson's Rd, so with the help of Google maps I quickly found a name and number, and got on the phone to get acquainted.
A few hours later I was down there in person, getting a tour of their little butchers shop.
Ben is a lovely man with a typical butcher's disposition. He loves his meat, and lots of it! I spent at least half an hour in his shop, talking about all the various cuts of meat I'm going to need, debating the virtues of pork shoulder versus pork neck, asking one of his customers for tips on cooking beef cheek, and generally getting a sense of whether I was going to do business with this place.
My visit ended with a very generous bag of 'samples' - beef cheek, sausages, mince & chuck steak - which Ben refused to let me pay for (however he did mention he likes red wine, so I plan to be better prepared next time I visit!). The beef cheek was a bit confronting. Much larger than I had expected, and with a few unfamiliar bits to trim that are going to prove challenging, but I know the effort will be worth it. I plan to buy some Pedro Ximenez sherry to cook it with, but in the mean time I've vacuum sealed it with my new vacuum sealing machine and popped it in the freezer - I'll revisit it when I have some time to do the surgery!

The mince we got was delicious. I know it's boring, but I'm planning on doing my tried and true version of bolognase sauce to sell. Ben's mince had just the right amount of fat to make it juicy, but not greasy. And it tasted delicious. It's a bit more expensive than other mince I can get, but figure I'd rather buy something that's locally grown and good quality, than cheap and from goodness-knows-where!
Which brings me to the local bit. Ben was almost misty-eyed when he talked about his animals. At the moment there are a lot of calves being born, so goodness knows how he manages to be front of house at the butchers shop AND manage the farming side of it, but I suspect it has a lot to do with his father Tim. Tim, by the way, is a man I had already met a month or so ago when my friend and I took some kids to his farm to pick blackberries. Little did I know that the gentle black bull I had to walk past to shut the gate that day was the sire of the meat I'm about to be cooking on a regular basis - but that's what I love about this story!

The cattle are born and raised in Main Ridge - one of my favourite places in the world and about 3 minutes drive from where I live. When they're grown to the right age, they're calmly hearded into a top pen in the afternoon and left to eat (their last supper!) while it gets dark. At about midnight, Ben walks them onto his truck and drives them up to Warragul to be slaughtered at a place that he claims is the "best in the southern hemisphere" because of their methods, and also their animal husbandry techniques. It seemed to me like a long way to go for a seemingly simple procedure, but it made me realise that there are probably 'ways and ways' to kill a beast, and it reassures me to know that he would go to such lengths to ensure his animals are not stressed in their final hours of life. (Oh, I probably should have said earlier that if you don't like to think about where your meat comes from, don't read this!).
He then brings back the carcasses and hangs them in his chiller room for a minimum of 3 weeks. This process is what distinguishes his meat from what you'd buy from the supermarket (most of which was still alive only days before it hit the shelves), as it develops a flavour and texture that is what good meat is all about. He let me hang out with these ageing bodies, which I probably should have tried to appreciate more, but it all just looked like legs and ribcages to me - the meat was hiding beneath layers of blue skin and dull bones.
Not enough to put me off though, and the end result is that I CAN'T WAIT to start using his meat. Interestingly, he told me about his experiences with supplying local restaurants with his product. He tried it for a while, but found it was not a sustainable relationship. Restaurants change their menus, their numbers and therefore their demands from week to week. Because Ben's meat takes 3 weeks to mature, filling large orders with only a week or two's notice is either impossible, or it means using all his stock for the shop, leaving his other customers with nothing to buy. He has now had to say no to all but two local businesses, and these lucky two are willing to work with him in timing, quantities and seasonal fluctuations - all of which come into much sharper focus when you're dealing with local products.

Ben likes the idea of supplying my business because he sees that I will have known quantities week to week, I aim to grow slowly, and I can plan ahead and be flexible about supply. We also hit it off really well, and I think we'll become good mates as I continue to order from him and talk to him about what's going on at his farm. I love being able to have that local knowledge, and long term I actually think that having a relationship with my suppliers will mean my products are not only more sustainably produced, but also ensure a higher quality product that is reflective of seasonal influences and protected from global instability.


This is Ben's Grandfather, selling meat to locals from the back of his cart in country Victoria. Circa 1950s

Sunday, February 20, 2011

First prototype!


Things are hotting up!
This is the beginning of the packing decisions that have to be made. (All comments welcomed!)
I'm happy with the pouch and the logo (although it won't have the line "great food to go" I need to come up with something 'original'). Quite like the font.
The top of the bag looks awful though. I think what I'll do is use a piece of red card, folded over the top, with general info on it that I can staple onto all my products.
This particular dish is delicious too - eggplant is all creamy, tomatoes add tang and the lamb is deliciously rich and lamby. Bought a whole shoulder from the butcher today and I'm happy with the result. Can't wait to try a whole pork shoulder next! YAY!!!!!

Tuesday, December 21, 2010

Christmas Terrine


Food traditions have strong emotional roots in most families, and Christmas food traditions would have to be some of the most important in mine. Food defines the way we celebrate in my family, and the more special the occasion, the more effort we put into the food we make for it.
Birthdays are also important food days, when you might get to have your favourite meal made for you, or go to your favourite restaurant. Food helps us feel special, and cooking food for others is a cook's way of sharing how they feel about family and friends. I like to cook for love. The food always tastes better when you do.

This is a recipe I've been making for several years now, usually around Christmas time as it's a perfect Summer food - great for sharing and handy to have in the fridge if people pop over - with Christmas colours and a hint of Christmas spice to make it beautiful.

Makes 2 so you can share it with everyone!

You'll need 2 bread loaf tins, or terrine molds if you're lucky enough to have such things.
Enough streaky bacon to line them both - bottom, sides and top - rind removed.

Bacon (see above)
1-2 chicken breast fillets
500g pork mince
300g veal mince
1 cup shelled pistachios
1 Tab pickled green peppercorns
2/3 cup dried cranberries
1 green apple, peeled & cut into small pieces
1 egg
1 tsp cinnamon
1 tsp ground cloves
1/2 tsp nutmeg
2 cloves crushed garlic
salt & pepper
brandy/cointreau/sherry

Start by cutting the chicken breast lengthwise into long strips, about 1cm x 1cm. Place the strips in a bowl and pour over brandy or other liqueur to about half cover. Turn strips over a few times to coat, then cover with plastic wrap and put in the fridge for 2-12 hours.

Next, prepare your other ingredients. If you have an electric mixer, use it, otherwise just use a large bowl and a wooden spoon.
Place minces, nuts, peppercorns, berries, apple, egg, spices, garlic and salt and pepper in a bowl and mix until well combined. Drain excess liquor off chicken strips and add this to the mince as well. The more you mix the filling, the smoother the terrine will be, but don't mix so much that the nuts and fruit begin to disintegrate.

Now you can begin to assemble the terrines. Take your loaf tins or terrine dishes and line the bottom, ends and sides with bacon. If you have long pieces you can let them hang over the sides and they can be used to cover the top. Once lined, begin to place spoonfuls of the mince into the terrine molds. Fill to about a third, then place strips of the marinated chicken length wise on the mince. Top up with more mince to about 1-2cm from the top of the tin, and gently press to even the top. Cover with more bacon. Place a piece of baking paper over the top, and then wrap the entire thing in aluminium foil. Repeat process for the second tin.

Once prepared, place tins in a baking dish, and pour boiling water into the bottom of the dish (not over the terrines) to make a shallow water bath. Place in a low to moderate oven (about 150C) for 1 hour and 20 minutes. To test if done, gently press on the terrine. If the juices run clear, it's ready. It they are still very pink, it may need a bit longer. Depends on the size of the terrine dish/loaf tin.

Once cooked, remove from oven but keep in the baking dish. Place weights on the terrines - such as 400g tins of tomatoes - for about 1/2 an hour. Drain some of the excess liquid off, but not all of it as the terrines can become dry. Remove from tins (hopefully in one piece!), wrap in plastic wrap and place in the fridge.

The terrines will last up to one week in the fridge. To serve, slice thinly (3-5mm), and serve at room temperature with slices of toasted French bread, gherkins and plum chutney.



Sunday, May 2, 2010

Apple and Almond Crown


a>I recently bought a wonderful book called "A Piece of Cake" by Leila Lindholm. It's full of really decadent cakes, breads and pastries, but the ones that caught my eye first were the yeast-based cakes. She gives a basic recipe for the dough, and then several variations of flavours and fillings. I chose to make one with apple and almond, and I loved the whole process of making the dough, then the almond paste, then finally bringing them together in this delicious cake!

I recommend buying the book, but in the mean time I will share a little taste of it below.


Apple and Almond Crown (makes two)

For the dough:
1 T cardamom pods, ground finely (or buy ready ground)
300ml milk
50g yeast
135g caster sugar
1/2 t salt
150g butter
1 egg
660-720g flour

Warm the milk with the cardamom powder until tepid (38C). Sprinkle over yeast, then add sugar, salt, butter and egg. Gradually add flour to make a silky dough (I use a kenwood mixer with a dough hook, you can just use a spoon then knead by hand). Knead gently, then cover and leave to rise for an hour.

For the Almond paste:
250g almonds
225g castor sugar
Blanch the almonds (by pouring boiling water over them, leaving the to soak and then slipping the skins off. VERY time consuming, so buy blanched or ground almonds if you're in a hurry!).
Process almonds in a food processor to a fine powder, add the sugar and process a further 5-7 minutes to make a smooth paste.

For the crowns:
1 egg, handful of slivered almonds, 200g unsalted butter, 1tsp ground cinnamon, 90g brown sugar, 200g almond paste, 2 apples.

Once dough has risen, divide in half and roll each portion on a lightly floured surface to a 20x30cm rectangle.

Mix butter, sugar, cinnamon and almond paste together until creamy. Divide filling and spread over each dough rectangle. Grate an apple over each rectangle, then roll them up like a sponge roll. You can either cook these cakes on a flat tray or in a cake tin (see photo).


Place the roll in a loop on a greased tray or cake tin. Leave to prove for 1 hour. Brush with beaten egg, then sprinkle with slivered almonds. Bake at 175C for about 20-30 minutes until golden. YUMMO!!!